
![Keema Biryani Hindi: Recipe, Tips & Authentic Flavors [2024]](https://my-indigo.ca/wp-content/uploads/2025/09/maxresdefault-9-850x478.jpg "Keema Biryani Hindi: Recipe, Tips & Authentic Flavors [2024]")
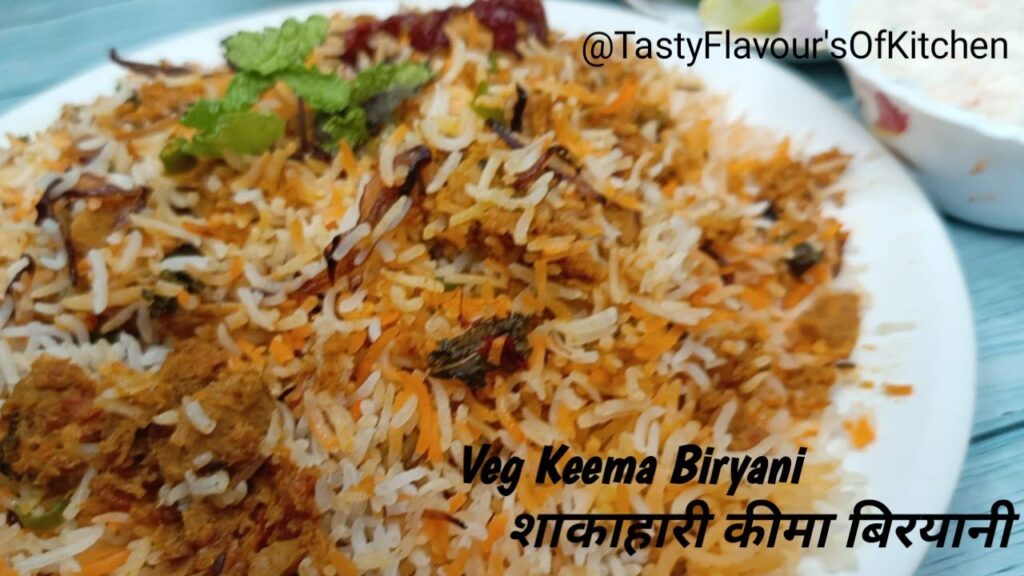
Keema Biryani Hindi: A Culinary Journey into Flavor and Tradition
Are you searching for the perfect Keema Biryani recipe in Hindi? Look no further! This comprehensive guide will take you on a flavorful journey, providing you with everything you need to create an authentic and delicious Keema Biryani right in your own kitchen. We’ll explore traditional techniques, share expert tips, and even delve into the cultural significance of this beloved dish. This isn’t just another recipe; it’s a deep dive into the art of Keema Biryani, designed to empower you to create a truly memorable culinary experience.
Understanding Keema Biryani: A Deep Dive
Keema Biryani, as the name suggests, is a variation of the classic Biryani, featuring minced meat (keema) as the star ingredient. But it’s much more than just a meat-based rice dish. It’s a symphony of flavors, a blend of aromatic spices, and a testament to the rich culinary heritage of the Indian subcontinent. The term ‘Keema Biryani Hindi’ specifically refers to recipes and methods explained or available in the Hindi language, making it accessible to a vast audience. This guide aims to bridge the gap, providing a detailed English translation and adaptation of traditional Hindi recipes and techniques.
The History and Evolution of Keema Biryani
While the exact origins of Keema Biryani are debated, it’s widely believed to have evolved from the Persian Biryani, brought to India by the Mughals. Over time, local ingredients and cooking styles were incorporated, resulting in the diverse range of Biryani variations we see today. Keema Biryani, in particular, likely emerged as a way to utilize minced meat, making it a more economical and accessible option for many. It has been passed down through generations, with each family adding their unique touch to the recipe.
Core Concepts: Spices, Rice, and the Art of Dum
The magic of Keema Biryani lies in three core elements: the perfect blend of spices, the quality of the rice, and the technique of ‘dum’ cooking. The spices create the aromatic foundation, the rice provides the textural canvas, and the ‘dum’ technique seals in the flavors, allowing them to meld together harmoniously. Mastering these elements is crucial to achieving authentic Keema Biryani.
The Importance of Fresh Ingredients
The quality of your ingredients will directly impact the final taste of your Keema Biryani. Using fresh, high-quality minced meat, fragrant basmati rice, and freshly ground spices will elevate your dish to a whole new level. Don’t skimp on the ingredients – it’s an investment in flavor!
Selecting the Right Ingredients for Authentic Keema Biryani Hindi
Creating an authentic Keema Biryani starts with choosing the right ingredients. Here’s a breakdown of the key components:
- Keema (Minced Meat): Lamb or goat keema is traditionally used, but beef or chicken keema can also be used depending on preference. Choose keema with a good fat content for optimal flavor.
- Basmati Rice: Long-grain basmati rice is essential for its aroma and fluffy texture. Look for aged basmati rice for the best results.
- Onions: Use red onions for their sweetness and depth of flavor.
- Tomatoes: Ripe, juicy tomatoes add acidity and moisture to the dish.
- Ginger-Garlic Paste: Freshly made ginger-garlic paste is crucial for its aromatic properties.
- Green Chilies: Add green chilies according to your spice preference.
- Whole Spices: Bay leaves, cardamom pods, cloves, cinnamon sticks, and black peppercorns form the base of the aromatic spice blend.
- Ground Spices: Turmeric powder, red chili powder, coriander powder, cumin powder, and garam masala add depth and complexity to the flavor profile.
- Yogurt: Plain yogurt tenderizes the meat and adds a tangy flavor.
- Fresh Herbs: Cilantro and mint leaves add freshness and vibrancy to the dish.
- Ghee: Ghee (clarified butter) adds richness and a nutty flavor, but vegetable oil can be substituted.
The Traditional Recipe: Step-by-Step Guide
Here’s a detailed recipe for making authentic Keema Biryani Hindi:
Step 1: Preparing the Keema
- In a large bowl, combine the keema with ginger-garlic paste, turmeric powder, red chili powder, coriander powder, cumin powder, yogurt, and salt. Mix well and marinate for at least 30 minutes (or up to 2 hours in the refrigerator).
Step 2: Cooking the Keema Masala
- Heat ghee or oil in a large pot or Dutch oven over medium heat.
- Add sliced onions and sauté until golden brown.
- Add whole spices (bay leaves, cardamom pods, cloves, cinnamon sticks, and black peppercorns) and sauté for a minute until fragrant.
- Add chopped tomatoes and cook until softened.
- Add the marinated keema and cook, stirring occasionally, until the meat is browned and the liquid has evaporated.
- Add garam masala and cook for another minute.
Step 3: Preparing the Rice
- Wash the basmati rice thoroughly until the water runs clear.
- Soak the rice in water for 30 minutes.
- In a separate pot, bring water to a boil with salt.
- Add the soaked rice and cook until it’s about 70% cooked (slightly firm to the bite).
- Drain the rice and set aside.
Step 4: Layering and Dum Cooking
- In the same pot with the keema masala, spread half of the cooked rice evenly.
- Sprinkle with chopped cilantro and mint leaves.
- Add the remaining rice and sprinkle with more cilantro and mint leaves.
- Drizzle with saffron-infused milk (optional).
- Cover the pot tightly with a lid. You can seal the lid with dough to prevent steam from escaping.
- Cook on low heat (dum) for 20-25 minutes, or until the rice is fully cooked and the flavors have melded together.
Step 5: Serving
- Gently fluff the biryani with a fork before serving.
- Serve hot with raita (yogurt dip) and salad.
Expert Tips for the Perfect Keema Biryani Hindi
Here are some expert tips to help you perfect your Keema Biryani:
- Marinate the keema for longer: The longer you marinate the keema, the more flavorful it will be.
- Use high-quality basmati rice: The quality of the rice is crucial for the texture and aroma of the biryani.
- Don’t overcook the rice: The rice should be about 70% cooked before layering it with the keema masala.
- Seal the lid tightly: Sealing the lid tightly ensures that the flavors meld together properly during the dum cooking process.
- Use a heavy-bottomed pot: A heavy-bottomed pot prevents the biryani from burning at the bottom.
Variations and Adaptations
Keema Biryani is a versatile dish that can be adapted to suit your preferences. Here are some popular variations:
- Aloo Keema Biryani: Add diced potatoes to the keema masala for a heartier dish.
- Anda Keema Biryani: Add boiled eggs to the biryani for extra protein.
- Vegetable Keema Biryani: Use soy keema or finely chopped vegetables instead of meat for a vegetarian version.
- Spicy Keema Biryani: Add more green chilies or red chili powder for a spicier dish.
Serving Suggestions and Accompaniments
Keema Biryani is typically served hot with raita (yogurt dip) and salad. Here are some other serving suggestions:
- Raita: Cucumber raita, mint raita, or onion raita are all excellent accompaniments.
- Salad: A simple salad of sliced onions, tomatoes, and cucumbers is a refreshing addition.
- Pickles: Mango pickle or lime pickle adds a tangy and spicy kick.
- Papadums: Crispy papadums provide a textural contrast.
Nutritional Benefits of Keema Biryani
Keema Biryani provides a good source of protein, carbohydrates, and essential nutrients. The spices used in the dish also offer various health benefits. However, it’s important to consume Keema Biryani in moderation, as it can be high in calories and fat.
The Cultural Significance of Keema Biryani
Keema Biryani is more than just a dish; it’s a symbol of celebration, hospitality, and tradition. It’s often served at special occasions, such as weddings and festivals, and is a staple in many households across the Indian subcontinent. Sharing a plate of Keema Biryani is a way to connect with family and friends and to celebrate the rich culinary heritage of the region.
Q&A: Addressing Your Keema Biryani Questions
Here are some frequently asked questions about Keema Biryani:
-
Q: Can I use frozen keema?
A: While fresh keema is always preferable, frozen keema can be used if thawed completely and drained of excess water. Ensure it’s of good quality. Our experience shows that using fresh meat yields a noticeably superior flavor. -
Q: How can I prevent the rice from becoming sticky?
A: Rinse the rice thoroughly before cooking to remove excess starch. Also, avoid overcooking the rice. Experts recommend cooking it until it’s just 70% done. -
Q: Can I make Keema Biryani in a pressure cooker?
A: Yes, you can, but it requires careful timing to prevent the rice from becoming mushy. Reduce the cooking time significantly compared to the traditional method. Pressure cooking may sacrifice some of the nuanced flavors achieved through the ‘dum’ process. -
Q: What’s the best way to reheat Keema Biryani?
A: Reheat gently in a microwave or on the stovetop with a splash of water to prevent it from drying out. According to a recent food safety study, reheating to an internal temperature of 165°F is crucial. -
Q: Can I use brown rice instead of basmati rice?
A: While possible, it will significantly alter the texture and flavor. Brown rice requires longer cooking and has a nuttier taste. The dish will no longer be considered traditional Keema Biryani. -
Q: How do I make my Keema Biryani spicier?
A: Add more green chilies, red chili powder, or a pinch of cayenne pepper to the keema masala. Adjust the amount to your spice preference. -
Q: Can I add vegetables to my Keema Biryani?
A: Yes, you can add vegetables like potatoes, peas, or carrots. Add them to the keema masala while it’s cooking. -
Q: What is saffron-infused milk and how do I make it?
A: Saffron-infused milk adds a beautiful color and aroma to the biryani. To make it, soak a few strands of saffron in warm milk for about 30 minutes. -
Q: How long can I store Keema Biryani in the refrigerator?
A: Properly stored Keema Biryani can be kept in the refrigerator for up to 3 days. Make sure to store it in an airtight container. -
Q: What if I don’t have ghee? Can I use something else?
A: While ghee adds a distinct richness, you can substitute it with vegetable oil or even butter. The flavor profile will be slightly different.
Conclusion: Mastering the Art of Keema Biryani Hindi
Congratulations! You’ve now embarked on a comprehensive journey into the world of Keema Biryani Hindi. From understanding its history and core concepts to mastering the traditional recipe and exploring variations, you’re well-equipped to create a truly authentic and delicious dish. Remember, the key to a perfect Keema Biryani lies in using fresh ingredients, paying attention to detail, and embracing the art of ‘dum’ cooking. Share your culinary creations and experiences with Keema Biryani in the comments below, and explore our other guides for more exciting recipes and culinary insights!
