
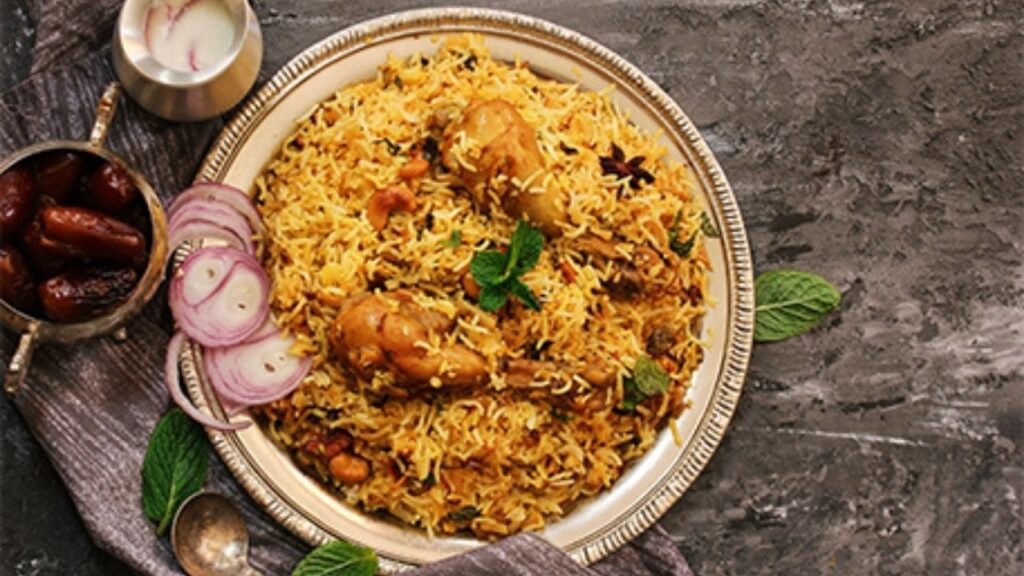
![Authentic Biryani Pilavi Tarifi: The Ultimate Guide [2024]](https://my-indigo.ca/wp-content/uploads/2025/09/biryani-6-850x478.jpg "Authentic Biryani Pilavi Tarifi: The Ultimate Guide [2024]")
Biryani Pilavi Tarifi: Master the Art of This Exquisite Dish
Craving the rich, aromatic flavors of a perfectly cooked biryani pilavi? You’ve come to the right place. This comprehensive guide provides everything you need to know to create an authentic and unforgettable biryani pilavi at home. We’ll delve into the history, techniques, ingredients, and secrets that elevate this dish from simple rice to a culinary masterpiece. Forget complicated recipes and underwhelming results; we’ll empower you with the knowledge and confidence to consistently produce biryani pilavi that rivals the finest restaurants. Whether you’re a seasoned cook or a complete beginner, this biryani pilavi tarifi will guide you every step of the way. Prepare to embark on a flavorful journey!
What Exactly is Biryani Pilavi? A Deep Dive
Biryani pilavi isn’t just rice; it’s an experience. It’s a symphony of flavors, textures, and aromas that come together to create something truly special. While often used interchangeably, it’s crucial to understand that ‘biryani’ and ‘pilavi’ represent distinct cooking methods, each contributing unique characteristics to the final dish. This guide will explore both, focusing on recipes and techniques that blend the best of both worlds.
The Essence of Pilavi: Simplicity and Elegance
Pilavi, at its core, is a rice dish cooked in broth, typically with aromatics and other ingredients such as vegetables or meat. The key to a great pilavi is perfectly cooked rice – fluffy, separate grains that retain their individual integrity. The broth infuses the rice with flavor, creating a harmonious and satisfying dish. A pilavi is often simpler and more subtle in flavor compared to a biryani.
The Soul of Biryani: Layering and Aromatic Intensity
Biryani, on the other hand, is a more complex dish involving layering rice, meat (or vegetables), and aromatic spices. The ingredients are often par-cooked separately and then assembled in a pot for a final slow cooking, allowing the flavors to meld and deepen. The result is a dish with distinct layers of flavor and texture, intensely aromatic and rich.
Biryani Pilavi: A Harmonious Fusion
Biryani pilavi, as we explore in this tarifi (recipe), represents a delightful fusion of these two techniques. It often incorporates the layering and aromatic complexity of a biryani while retaining the focus on perfectly cooked rice that defines a pilavi. Our recipe aims to give you the best of both worlds!
A Brief History of Biryani and Pilavi
The history of both biryani and pilavi is rich and varied, with roots stretching back centuries. Pilavi-like dishes are found across many cultures, reflecting the universal appeal of cooking rice in flavorful broth. Biryani, however, is often traced back to the Mughal Empire in India, where it evolved from simpler rice dishes into the elaborate and flavorful creation we know today. Understanding this history adds depth and appreciation to the dish.
Why Biryani Pilavi Matters Today
In today’s culinary landscape, biryani pilavi remains a beloved and versatile dish. It’s perfect for special occasions, family gatherings, or even a satisfying weeknight meal. Its adaptability allows for endless variations, catering to different tastes and dietary preferences. Recent culinary trends show a renewed interest in global cuisines and authentic flavors, making biryani pilavi more relevant than ever.
Essential Ingredients for an Authentic Biryani Pilavi
The quality of your ingredients will significantly impact the final result. Here’s a breakdown of the key components:
- Rice: Basmati rice is the gold standard for biryani pilavi. Look for long-grain, aged basmati rice for the best texture and aroma. Soaking the rice before cooking is a crucial step for fluffy results.
- Meat (Optional): Chicken, lamb, beef, or even seafood can be used. Choose cuts that will become tender during slow cooking, such as bone-in chicken thighs or lamb shoulder.
- Vegetables: Onions, tomatoes, potatoes, carrots, and peas are common additions. Feel free to experiment with other vegetables based on your preferences.
- Spices: This is where the magic happens! Essential spices include cardamom, cinnamon, cloves, bay leaves, cumin, coriander, turmeric, chili powder, and garam masala. Fresh ginger and garlic are also crucial.
- Aromatics: Saffron threads, rose water, and kewra water (pandan extract) add a touch of luxury and fragrance.
- Liquids: Broth (chicken, vegetable, or lamb) is essential for cooking the rice. Milk or yogurt can also be added for richness.
- Fats: Ghee (clarified butter) is traditionally used for its rich flavor, but vegetable oil or butter can be substituted.
Saffron: The Golden Touch
Saffron is a crucial ingredient in authentic biryani pilavi, lending its vibrant color and delicate flavor. To extract the most flavor and color, soak saffron threads in warm milk or water for at least 30 minutes before adding them to the dish. This releases the saffron’s compounds, resulting in a more intense flavor and color.
Ghee vs. Oil: Choosing the Right Fat
Ghee imparts a distinctive richness and aroma to biryani pilavi that is hard to replicate. However, if you don’t have ghee on hand, vegetable oil or butter can be used as substitutes. If using butter, be careful not to burn it.
Biryani Pilavi Tarifi: Step-by-Step Instructions
Now, let’s get to the heart of the matter: the recipe! This recipe is designed to be easy to follow, even for beginners. We’ll break down each step into clear and concise instructions.
Ingredients:
- 2 cups basmati rice, soaked for 30 minutes
- 1 lb chicken, cut into pieces
- 2 large onions, thinly sliced
- 2 tomatoes, chopped
- 1 potato, peeled and cubed
- 1 carrot, diced
- 1 cup peas
- 2 tbsp ginger-garlic paste
- 1 tsp turmeric powder
- 1 tsp chili powder
- 1 tsp cumin powder
- 1 tsp coriander powder
- 1/2 tsp garam masala
- 4 green cardamoms
- 2 cloves
- 1 inch cinnamon stick
- 2 bay leaves
- 4 cups chicken broth
- 1/4 cup ghee (or vegetable oil)
- Saffron threads, soaked in 2 tbsp warm milk
- Salt to taste
- Fresh cilantro, chopped (for garnish)
- Fresh mint, chopped (for garnish)
Instructions:
- Prepare the Chicken: In a bowl, marinate the chicken with ginger-garlic paste, turmeric powder, chili powder, cumin powder, coriander powder, garam masala, and salt. Mix well and set aside for at least 30 minutes.
- Sauté the Aromatics: Heat ghee in a large pot or Dutch oven over medium heat. Add sliced onions and sauté until golden brown. Add cardamoms, cloves, cinnamon stick, and bay leaves. Sauté for another minute until fragrant.
- Cook the Chicken: Add the marinated chicken to the pot and sauté until browned on all sides. Add chopped tomatoes and cook until they soften.
- Add Vegetables: Add potatoes, carrots, and peas to the pot. Sauté for a few minutes.
- Layer the Rice: Drain the soaked rice and add it to the pot. Gently stir to combine with the chicken and vegetables.
- Add Broth and Saffron: Pour in the chicken broth and add the saffron milk. Bring to a boil, then reduce heat to low, cover tightly, and simmer for 20-25 minutes, or until the rice is cooked through and the liquid is absorbed.
- Rest and Fluff: Turn off the heat and let the biryani pilavi rest for 10 minutes before fluffing with a fork.
- Garnish and Serve: Garnish with fresh cilantro and mint. Serve hot and enjoy!
Tips and Tricks for Biryani Pilavi Perfection
Even with a great recipe, a few extra tips can make all the difference. Here are some secrets to elevate your biryani pilavi:
- Soaking the Rice: Don’t skip this step! Soaking the rice allows it to absorb moisture evenly, resulting in fluffy, separate grains.
- Browning the Onions: Properly browning the onions is crucial for developing the rich, sweet flavor base of the dish.
- Low and Slow Cooking: Simmering the biryani pilavi over low heat allows the flavors to meld and deepen.
- Resting Time: Allowing the biryani pilavi to rest after cooking allows the steam to redistribute, preventing it from becoming mushy.
- Don’t Overmix: Avoid overmixing the rice, as this can cause it to break and become sticky.
Troubleshooting Common Biryani Pilavi Problems
Even experienced cooks can encounter challenges. Here are some solutions to common problems:
- Rice is Mushy: Use less broth or reduce the cooking time. Ensure the pot is tightly covered to prevent excess steam from escaping.
- Rice is Undercooked: Add a little more broth and continue simmering until the rice is cooked through.
- Biryani Pilavi is Bland: Add more spices or salt to taste. Consider using a richer broth.
- Bottom of Pot is Burning: Reduce the heat and ensure the pot is tightly covered. You can also try placing a heat diffuser under the pot.
Variations and Adaptations of Biryani Pilavi Tarifi
The beauty of biryani pilavi lies in its versatility. Feel free to experiment with different ingredients and techniques to create your own unique version.
- Vegetarian Biryani Pilavi: Substitute the meat with vegetables like paneer (Indian cheese), mushrooms, or cauliflower.
- Seafood Biryani Pilavi: Use shrimp, prawns, or fish instead of meat.
- Lamb Biryani Pilavi: Use lamb shoulder or leg of lamb for a richer flavor.
- Chicken Biryani Pilavi: Bone in chicken thighs give the best flavor.
- Spicy Biryani Pilavi: Add more chili powder or green chilies for a spicier kick.
- Sweet Biryani Pilavi: Add dried fruits like raisins and apricots for a touch of sweetness.
Exploring Regional Variations
Biryani pilavi varies significantly across different regions, each with its own unique flavors and techniques. From the Hyderabadi biryani with its slow-cooked meat and aromatic spices to the Lucknowi biryani with its delicate flavors and fragrant rice, there’s a world of biryani pilavi to explore.
The Perfect Accompaniments for Biryani Pilavi
No biryani pilavi is complete without the right accompaniments. Here are some classic pairings:
- Raita: A cooling yogurt-based dip with cucumbers, onions, and herbs.
- Salad: A simple salad of sliced cucumbers, tomatoes, and onions.
- Pickles: Tangy and spicy pickles add a contrasting flavor.
- Papadums: Crispy lentil wafers.
- Curry: A complementary curry dish, such as dal makhani or butter chicken.
Raita: The Cooling Counterpoint
Raita is the perfect accompaniment to biryani pilavi, providing a cooling and refreshing counterpoint to the rich and spicy flavors of the dish. The yogurt base helps to soothe the palate, while the cucumbers and herbs add a refreshing element. Raita is very easy to prepare, and can be customized to your taste.
Biryani Pilavi as a Culinary Concept
Biryani pilavi, beyond being a recipe, represents a culinary concept of layering flavors and textures to create a harmonious dish. This concept can be applied to other cuisines and dishes, encouraging creativity and experimentation in the kitchen. Understanding the principles behind biryani pilavi can inspire you to create your own unique culinary masterpieces.
The Art of Layering Flavors
The art of layering flavors is a key element of biryani pilavi. By carefully combining different spices, aromatics, and ingredients, you can create a dish with depth and complexity. This technique can be applied to other dishes, such as stews, soups, and even salads.
Nutritional Information and Health Benefits
Biryani pilavi can be a relatively nutritious meal, depending on the ingredients used. It provides carbohydrates from the rice, protein from the meat or vegetables, and vitamins and minerals from the spices and vegetables. However, it can also be high in calories and fat, so moderation is key. Choosing lean meats, using less oil, and adding plenty of vegetables can help to make it a healthier option. A key benefit is the rich blend of spices used, many of which have potent antioxidant and anti-inflammatory properties.
Controlling Portion Sizes
Due to its rich flavor and high calorie content, it’s important to be mindful of portion sizes when enjoying biryani pilavi. Pairing it with a large salad or vegetable side dish can help to balance the meal and increase its nutritional value.
Biryani Pilavi: A Symbol of Celebration
In many cultures, biryani pilavi is more than just a dish; it’s a symbol of celebration and togetherness. It’s often served at weddings, festivals, and other special occasions, representing abundance and hospitality. Sharing a pot of biryani pilavi with loved ones is a cherished tradition that brings people together. The preparation itself can be a shared activity, with family members contributing to different aspects of the dish.
Passing Down the Tradition
Many families have their own secret biryani pilavi recipes, passed down through generations. These recipes are often closely guarded, representing a link to the past and a connection to family history. Learning to make your family’s biryani pilavi is a way to honor your heritage and continue the tradition.
Q&A: Your Biryani Pilavi Questions Answered
- Q: What’s the best type of pot to use for biryani pilavi?
A: A heavy-bottomed pot or Dutch oven is ideal, as it distributes heat evenly and prevents burning. A non-stick pot can also be used, but be careful not to scratch the surface.
- Q: Can I make biryani pilavi in a rice cooker?
A: Yes, you can, but the results may not be as authentic as cooking it on the stovetop. You’ll need to adjust the liquid ratio and cooking time accordingly. Look for rice cookers with a “biryani” setting.
- Q: How do I prevent the rice from sticking to the bottom of the pot?
A: Use a heavy-bottomed pot, ensure there’s enough liquid, and simmer over low heat. Avoid opening the lid frequently during cooking.
- Q: Can I use brown rice instead of basmati rice?
A: While possible, it will drastically change the texture and cooking time. Brown rice requires more liquid and a longer cooking time. The flavor profile will also be different.
- Q: How long does biryani pilavi last in the refrigerator?
A: Properly stored in an airtight container, biryani pilavi can last for 3-4 days in the refrigerator.
- Q: Can I freeze biryani pilavi?
A: Yes, you can freeze it for up to 2-3 months. Thaw it overnight in the refrigerator before reheating.
- Q: How do I reheat biryani pilavi?
A: You can reheat it in the microwave, on the stovetop, or in the oven. Add a splash of water or broth to prevent it from drying out.
- Q: What’s the secret to making the perfect raita?
A: Use thick, creamy yogurt, and add finely chopped cucumbers, onions, and herbs. Season with salt, pepper, and a pinch of cumin powder.
- Q: Can I make biryani pilavi in advance?
A: Yes, you can prepare it a day ahead of time and reheat it before serving. This allows the flavors to meld even further.
- Q: How do I adjust the spice level of biryani pilavi?
A: Add more or less chili powder or green chilies to adjust the spice level to your liking. You can also use different types of chilies for varying levels of heat.
Conclusion: Mastering the Biryani Pilavi Tarifi
Congratulations! You’ve now embarked on a journey to master the art of biryani pilavi. This guide has provided you with the knowledge, techniques, and inspiration to create an authentic and unforgettable dish. Remember, the key to a great biryani pilavi is attention to detail, quality ingredients, and a willingness to experiment. In our experience, mastering this recipe opens the door to understanding so many other complex dishes and flavor profiles. Don’t be afraid to try different variations and adapt the recipe to your own taste preferences. The possibilities are endless! Now it’s your turn to create your own biryani pilavi masterpiece and share it with your loved ones. We encourage you to share your experiences with biryani pilavi tarifi in the comments below. What are your favorite variations? What tips and tricks have you discovered? Let’s build a community of biryani pilavi enthusiasts!
