

Prepare Dum Biryani: A Comprehensive Guide to Restaurant-Quality Perfection
Craving authentic, melt-in-your-mouth Dum Biryani? You’re not alone. This aromatic rice dish, layered with marinated meat and fragrant spices, is a culinary masterpiece. But preparing it at home can seem daunting. This comprehensive guide will demystify the process, providing you with expert techniques and foolproof tips to prepare Dum Biryani that rivals your favorite restaurant. We’ll delve into the nuances of each step, from selecting the right ingredients to mastering the art of ‘dum’ cooking, ensuring a truly unforgettable dining experience. This isn’t just a recipe; it’s a journey to biryani perfection. Get ready to impress your family and friends with your newfound culinary skills!
Understanding Dum Biryani: History, Technique, and Flavor
Dum Biryani isn’t just a dish; it’s a culinary tradition steeped in history and technique. The word ‘dum’ refers to the slow cooking process where the ingredients are sealed in a pot and cooked over low heat, allowing the flavors to meld and infuse beautifully. This method originated in the Mughal kitchens of India and has evolved into countless regional variations, each boasting its unique blend of spices and ingredients.
The Evolution of Dum Cooking
The ‘dum’ technique, meaning ‘to breathe’ or ‘to bake,’ is central to the biryani’s character. Traditionally, the pot was sealed with dough, and hot coals were placed on top and underneath, creating a gentle, even heat that slowly cooked the rice and meat. This process allows the meat to become incredibly tender and the rice to absorb all the aromatic flavors of the spices and herbs. While modern kitchens often use ovens or stovetops, the principle remains the same: slow, gentle cooking for maximum flavor.
Key Ingredients for Authentic Dum Biryani
The foundation of any great Dum Biryani lies in the quality of its ingredients. Here’s a breakdown of the essentials:
- Basmati Rice: Long-grain, aged Basmati rice is the gold standard. Its delicate aroma and fluffy texture are crucial for achieving the perfect biryani.
- Meat (Chicken, Lamb, or Goat): The choice of meat is a matter of personal preference. Chicken is a popular and readily available option, while lamb and goat offer a richer, more robust flavor.
- Yogurt: Used to marinate the meat, yogurt tenderizes the fibers and adds a tangy depth of flavor.
- Onions: Fried to a golden-brown crisp, onions provide sweetness and texture to the biryani.
- Ginger-Garlic Paste: The aromatic base for the marinade and gravy.
- Spices: A blend of whole and ground spices is what gives Dum Biryani its signature flavor. Common spices include cardamom, cloves, cinnamon, bay leaves, saffron, turmeric, chili powder, and coriander powder.
- Fresh Herbs: Cilantro and mint add a refreshing touch and vibrant color to the dish.
- Ghee (Clarified Butter): Ghee adds richness and aroma, enhancing the overall flavor profile.
Regional Variations: A World of Biryani Flavors
Dum Biryani is a dish with countless regional variations, each offering a unique twist on the classic recipe. Some popular variations include:
- Hyderabadi Biryani: Known for its spicy and aromatic flavors, Hyderabadi Biryani features layers of meat and rice cooked together in a ‘dum’ style.
- Lucknowi Biryani: Also known as Awadhi Biryani, this variation is characterized by its delicate flavors and subtle use of spices.
- Calcutta Biryani: This version often includes potatoes and boiled eggs, adding a unique texture and flavor to the dish.
- Malabar Biryani: From the coastal region of Kerala, Malabar Biryani is known for its use of coconut milk and a distinct blend of spices.
Essential Equipment for Preparing Dum Biryani
While the ingredients are crucial, having the right equipment will make the prepare dum biryani process much smoother and more efficient.
- Heavy-Bottomed Pot with a Tight-Fitting Lid: This is essential for even heat distribution and proper ‘dum’ cooking. A Dutch oven or a biryani pot specifically designed for this purpose is ideal.
- Large Mixing Bowls: For marinating the meat and mixing the rice.
- Frying Pan: For frying the onions to a golden-brown crisp.
- Mortar and Pestle or Spice Grinder: For grinding whole spices to release their aroma.
- Measuring Cups and Spoons: For accurate measurements of ingredients.
- Aluminum Foil or Dough: For sealing the pot during ‘dum’ cooking.
The Step-by-Step Guide to Prepare Dum Biryani
Here’s a detailed, step-by-step guide to prepare Dum Biryani that will help you achieve restaurant-quality results:
Step 1: Marinating the Meat (The Foundation of Flavor)
The marinade is where the meat absorbs all the wonderful flavors of the spices and yogurt. This step is crucial for tenderizing the meat and infusing it with aroma.
- In a large mixing bowl, combine the meat with yogurt, ginger-garlic paste, turmeric powder, chili powder, coriander powder, garam masala, salt, and lemon juice.
- Mix well to ensure the meat is evenly coated with the marinade.
- Cover the bowl and refrigerate for at least 4 hours, or preferably overnight, to allow the flavors to meld.
Step 2: Preparing the Rice (Fluffy and Aromatic)
The rice needs to be parboiled to perfection, ensuring it’s cooked just enough to be tender but still firm enough to hold its shape during the ‘dum’ cooking process.
- Wash the Basmati rice thoroughly under cold water until the water runs clear. This removes excess starch and prevents the rice from becoming sticky.
- Soak the rice in water for at least 30 minutes. This helps the rice cook evenly.
- In a large pot, bring water to a boil with salt, bay leaves, cardamom pods, and cloves.
- Add the soaked rice and cook for about 7-8 minutes, or until the rice is about 70% cooked. It should still have a slight bite to it.
- Drain the rice and set it aside.
Step 3: Frying the Onions (Golden and Crispy)
Fried onions add sweetness, texture, and a beautiful golden-brown color to the biryani. They are an essential component of the dish.
- Thinly slice the onions.
- Heat oil in a frying pan over medium heat.
- Add the sliced onions and fry until they are golden-brown and crispy. Stir frequently to prevent burning.
- Remove the fried onions from the pan and set them aside.
Step 4: Layering the Biryani (The Art of Assembly)
Layering the ingredients is an art in itself. It ensures that the flavors are evenly distributed throughout the biryani.
- In the heavy-bottomed pot, spread a layer of ghee.
- Add a layer of the marinated meat.
- Top with a layer of the parboiled rice.
- Sprinkle with fried onions, chopped cilantro, and mint.
- Repeat the layers until all the meat and rice are used up.
- Drizzle saffron-infused milk over the top layer of rice. This adds color and aroma.
- Add a spoonful of ghee over the top.
Step 5: The ‘Dum’ Cooking Process (Sealing in the Flavors)
This is the most crucial step in preparing Dum Biryani. It’s where the magic happens, and the flavors meld together to create a truly unforgettable dish.
- Seal the pot tightly with aluminum foil or a dough seal. To make a dough seal, mix flour and water to form a pliable dough. Roll it into a long rope and press it around the rim of the pot.
- Place the lid on top of the foil or dough seal.
- Cook the biryani over low heat for about 45-60 minutes. If using an oven, preheat it to 300°F (150°C) and bake for the same amount of time.
Step 6: Serving the Dum Biryani (Unveiling the Masterpiece)
Once the biryani is cooked, let it rest for about 10-15 minutes before opening the pot. This allows the flavors to settle and the rice to absorb any remaining moisture.
- Carefully remove the foil or dough seal.
- Gently fluff the rice with a fork, being careful not to break the grains.
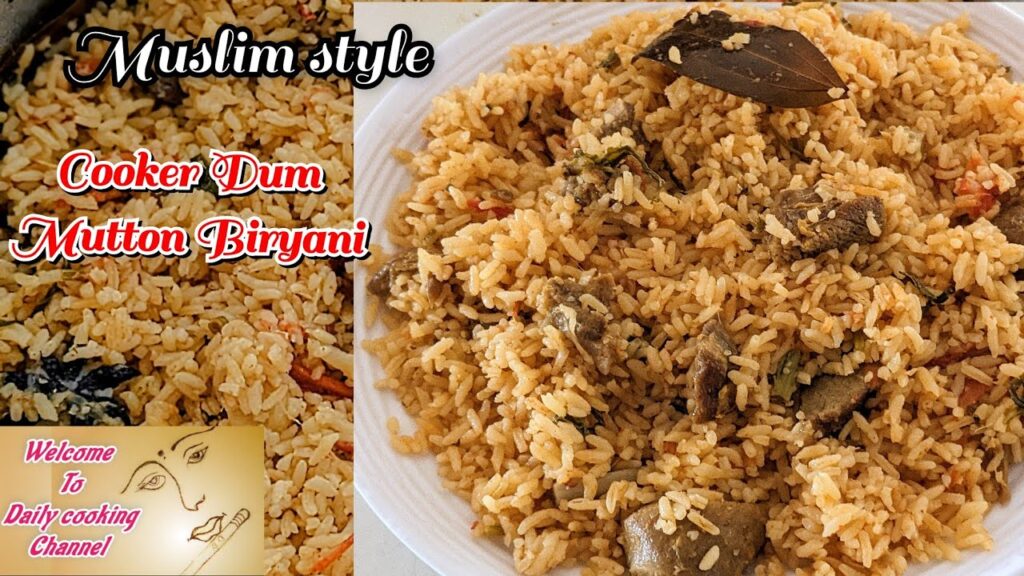
- Serve the Dum Biryani hot with raita (yogurt dip) and your favorite sides.
Tips and Tricks for Perfect Dum Biryani
Here are some expert tips and tricks to help you prepare Dum Biryani that is consistently delicious:
- Use Aged Basmati Rice: Aged Basmati rice has a lower moisture content and cooks up fluffier than freshly harvested rice.
- Don’t Overcook the Rice: The rice should be about 70% cooked before layering. It will continue to cook during the ‘dum’ process.
- Use a Heavy-Bottomed Pot: This ensures even heat distribution and prevents the biryani from burning.
- Seal the Pot Tightly: A tight seal is essential for trapping the steam and allowing the flavors to meld.
- Cook Over Low Heat: Slow cooking is key to tender meat and flavorful rice.
- Let it Rest: Allow the biryani to rest for 10-15 minutes after cooking before opening the pot.
- Experiment with Spices: Feel free to adjust the spice levels to your preference.
- Add a Touch of Rose Water or Kewra Water: These aromatic waters add a delicate floral note to the biryani.
Addressing Common Challenges When Preparing Dum Biryani
Even with a detailed guide, you might encounter some challenges when prepare dum biryani. Here’s how to overcome them:
- Rice is Sticky: Make sure to wash the rice thoroughly before cooking to remove excess starch. Also, avoid overcooking the rice.
- Meat is Dry: Ensure the meat is properly marinated for at least 4 hours, or preferably overnight. You can also add a little extra yogurt to the marinade.
- Biryani is Burning: Use a heavy-bottomed pot and cook over low heat. You can also place a tawa (flat griddle) under the pot to prevent burning.
- Flavors are Not Well-Blended: Ensure the pot is tightly sealed during the ‘dum’ cooking process. Also, allow the biryani to rest for 10-15 minutes after cooking before opening the pot.
Dum Biryani and Nutritional Information
Dum Biryani is a delicious and satisfying meal, but it’s also important to be mindful of its nutritional content. Here’s a general overview:
- Calories: A serving of Dum Biryani can range from 400-600 calories, depending on the ingredients and portion size.
- Protein: The meat provides a good source of protein.
- Carbohydrates: Rice is the primary source of carbohydrates.
- Fat: Ghee and oil contribute to the fat content.
- Vitamins and Minerals: Dum Biryani contains various vitamins and minerals from the spices, herbs, and vegetables.
To make Dum Biryani a healthier option, you can use lean meat, reduce the amount of ghee and oil, and add more vegetables.
Expert Q&A: Mastering Dum Biryani Techniques
Here are some frequently asked questions about prepare dum biryani, answered by our culinary experts:
- Q: Can I use brown rice instead of Basmati rice?
A: While you can use brown rice, it will alter the texture and flavor of the biryani. Brown rice requires a longer cooking time and has a nuttier flavor. - Q: Can I prepare Dum Biryani in a pressure cooker?
A: While it’s possible to adapt the recipe for a pressure cooker, it’s not recommended for achieving the authentic ‘dum’ effect. The slow cooking process is crucial for the flavors to meld properly. - Q: How can I prevent the rice from becoming mushy?
A: Ensure you wash the rice thoroughly before cooking and avoid overcooking it. The rice should be about 70% cooked before layering. - Q: What if I don’t have saffron?
A: Saffron adds a unique color and aroma, but you can substitute it with a pinch of turmeric powder for color. - Q: Can I use a different type of meat?
A: Absolutely! You can use chicken, lamb, goat, or even vegetables to make Dum Biryani. - Q: How long can I store leftover Dum Biryani?
A: Leftover Dum Biryani can be stored in the refrigerator for up to 2-3 days. - Q: Can I freeze Dum Biryani?
A: Freezing Dum Biryani is not recommended, as it can affect the texture of the rice. - Q: What is the best way to reheat Dum Biryani?
A: The best way to reheat Dum Biryani is in a microwave or on the stovetop with a little water to prevent it from drying out. - Q: Can I add vegetables to Dum Biryani?
A: Yes, you can add vegetables like potatoes, carrots, and peas to make a vegetable Dum Biryani. - Q: What is the secret to restaurant-quality Dum Biryani?
A: The secret lies in using high-quality ingredients, marinating the meat properly, and mastering the ‘dum’ cooking technique.
The Future of Dum Biryani: Innovation and Tradition
Dum Biryani continues to evolve, with chefs and home cooks experimenting with new flavors and techniques while staying true to the dish’s rich heritage. From fusion biryanis with international flavors to healthier versions with alternative grains and ingredients, the possibilities are endless. The enduring appeal of Dum Biryani lies in its ability to adapt and innovate while still preserving its core essence: a celebration of flavor, aroma, and culinary tradition.
Conclusion: Your Journey to Dum Biryani Mastery
Prepare Dum Biryani is an art, a science, and a culinary adventure. This guide has equipped you with the knowledge and techniques to create restaurant-quality Dum Biryani in your own kitchen. Remember to focus on high-quality ingredients, proper marination, and mastering the ‘dum’ cooking process. With practice and patience, you’ll be able to impress your family and friends with your newfound culinary skills. Now, it’s time to embark on your own Dum Biryani journey. Share your experiences and creations in the comments below! What are your favorite Dum Biryani variations? What challenges have you faced, and how did you overcome them? Let’s build a community of Dum Biryani enthusiasts and celebrate the joy of cooking and sharing this iconic dish.
