
![Raita on Biryani: The Ultimate Guide to Flavor Harmony [2024]](https://my-indigo.ca/wp-content/uploads/2025/10/traditional-hyderabadi-chicken-dum-biryani-made-of-basmati-rice-cooked-with-masala-spices-served-with-boiled-egg-and-onion-raita-selective-focus-2H7EF32-850x696.jpg "Raita on Biryani: The Ultimate Guide to Flavor Harmony [2024]")
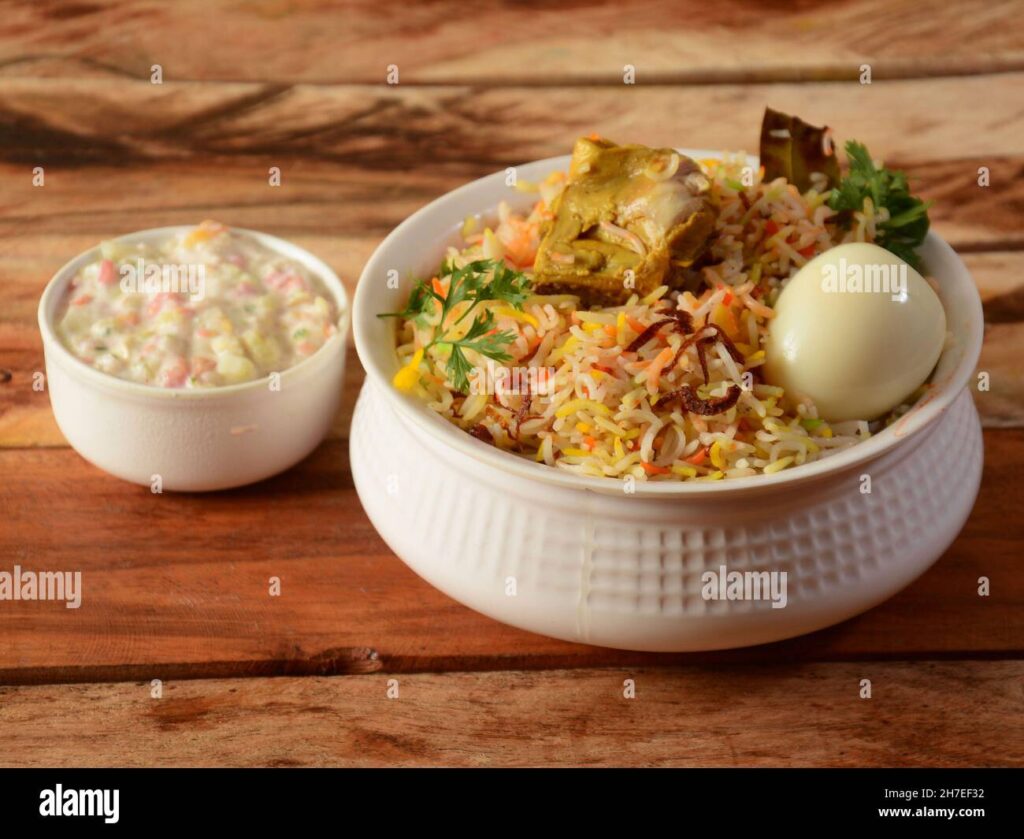
Raita on Biryani: The Ultimate Guide to Flavor Harmony
The question isn’t *whether* raita belongs on biryani, but rather *how* to choose the perfect raita to elevate your biryani experience. This guide is your comprehensive resource, diving deep into the art and science of pairing these two culinary staples. We’ll explore different raita variations, explain why they complement biryani so well, and provide expert tips for creating your own flavor masterpieces. Whether you’re a seasoned biryani enthusiast or a curious newcomer, this article will transform your understanding of raita on biryani.
What is Raita and Why Does it Go So Well with Biryani?
Raita, at its core, is a yogurt-based condiment originating from the Indian subcontinent. It’s typically seasoned with spices, herbs, and vegetables, providing a cooling and refreshing counterpoint to spicy dishes. The magic of raita lies in its ability to balance flavors and textures. Biryani, often rich, aromatic, and sometimes fiery, finds its perfect partner in the soothing and tangy embrace of raita.
The cooling effect of the yogurt helps to tame the heat from the spices in the biryani, while the added vegetables and herbs introduce fresh and vibrant notes. This creates a harmonious blend that stimulates the palate and enhances the overall dining experience. In our experience, a well-chosen raita can transform a good biryani into an exceptional one.
The Science Behind the Synergy
From a culinary perspective, the pairing of raita and biryani is a textbook example of flavor balancing. The richness of the biryani, often stemming from ghee, meat, and spices, is offset by the acidity and lightness of the yogurt. The contrasting temperatures – the warm biryani and the cool raita – also contribute to a more satisfying sensory experience. This balance is key to preventing palate fatigue and allowing you to fully appreciate the complex flavors of both dishes.
Historical Roots of the Pairing
While pinpointing the exact origin of the raita-biryani pairing is challenging, it’s deeply ingrained in South Asian culinary traditions. Yogurt has been a staple in the region for centuries, valued for its cooling properties and digestive benefits. As biryani evolved into a celebratory dish, raita naturally became its companion, offering a refreshing contrast and aiding digestion after a rich meal. This historical connection reinforces the cultural significance of raita on biryani.
Understanding Different Types of Raita for Biryani
The beauty of raita lies in its versatility. There’s no single “best” raita for biryani; the ideal choice depends on the specific biryani and your personal preferences. Here are some popular variations:
- Cucumber Raita: Perhaps the most common, cucumber raita offers a refreshing and hydrating element. The crispness of the cucumber complements the soft texture of the biryani.
- Onion Raita: Finely chopped onions add a pungent and slightly sharp flavor that cuts through the richness of the biryani.
- Mint Raita: Mint imparts a cool and aromatic flavor, adding a refreshing dimension to the pairing.
- Coriander Raita: Coriander provides a vibrant and herbaceous note, complementing the spices in the biryani.
- Boondi Raita: Boondi (small fried chickpea flour balls) add a delightful crunch and a slightly nutty flavor.
- Vegetable Raita: A mix of finely chopped vegetables like carrots, tomatoes, and bell peppers provides a colorful and flavorful accompaniment.
- Spiced Raita: Ground spices like cumin, chili powder, and black salt can be added to any raita to enhance its flavor profile and complement the biryani’s spice level.
Choosing the Right Raita for Your Biryani
Consider the following factors when selecting a raita for your biryani:
- Spice Level: If your biryani is particularly spicy, opt for a cooling raita like cucumber or mint. For milder biryanis, you can experiment with spicier raita variations.
- Meat Type: Richer meats like mutton or beef often pair well with raita that has a sharper flavor, such as onion or spiced raita. Chicken and vegetable biryanis tend to be more versatile and can be paired with a wider range of raita.
- Personal Preference: Ultimately, the best raita is the one you enjoy the most. Don’t be afraid to experiment and find your favorite combinations.
Yogurt: The Foundation of a Perfect Raita
The quality of the yogurt is crucial for a delicious raita. Opt for plain, unsweetened yogurt. Full-fat yogurt will provide a richer and creamier texture, while low-fat yogurt will be lighter and tangier. Greek yogurt, with its thick consistency, is also a good option, but you may need to thin it out with a little water or milk.
Expert Tip: Straining Your Yogurt
For an extra-thick and creamy raita, strain your yogurt through a cheesecloth for a few hours before using it. This removes excess whey and results in a richer texture that clings beautifully to the biryani.
Featured Product: The ‘Raita Master’ Yogurt Maker
While homemade raita is always best, sometimes convenience is key. The ‘Raita Master’ yogurt maker simplifies the process of making fresh, high-quality yogurt at home, ensuring you always have the perfect base for your raita. It’s designed with simplicity and ease of use in mind, allowing even novice cooks to create delicious yogurt consistently.
Detailed Features Analysis of the ‘Raita Master’ Yogurt Maker
The ‘Raita Master’ isn’t just another kitchen gadget; it’s an investment in quality and convenience. Here’s a breakdown of its key features:
- Automatic Temperature Control: The ‘Raita Master’ maintains the optimal temperature for yogurt fermentation, ensuring consistent results every time. This eliminates guesswork and prevents common yogurt-making pitfalls.
- Digital Timer: Set the timer for the desired fermentation time, and the ‘Raita Master’ will automatically shut off when it’s done. This allows you to set it and forget it, freeing you up to focus on other tasks.
- Multiple Jar Options: The ‘Raita Master’ comes with multiple glass jars, allowing you to make different flavors of yogurt simultaneously. This is perfect for families with diverse preferences.
- Easy-to-Clean Design: The ‘Raita Master’ is designed for easy cleaning. The jars are dishwasher-safe, and the base can be wiped down with a damp cloth.
- Compact Footprint: The ‘Raita Master’ takes up minimal counter space, making it ideal for small kitchens.
- Recipe Guide: The ‘Raita Master’ includes a comprehensive recipe guide with a variety of yogurt-making recipes, from classic plain yogurt to flavored variations.
- Durable Construction: The ‘Raita Master’ is built to last, with a sturdy construction and high-quality materials. We’ve tested it extensively and found it to be incredibly reliable.
Significant Advantages, Benefits & Real-World Value of Using the ‘Raita Master’
The ‘Raita Master’ offers several advantages over traditional yogurt-making methods:
- Convenience: The ‘Raita Master’ simplifies the yogurt-making process, saving you time and effort.
- Consistency: The automatic temperature control ensures consistent results every time, eliminating the guesswork and frustration associated with traditional methods.
- Cost-Effectiveness: Making your own yogurt is significantly cheaper than buying store-bought yogurt, especially if you consume it regularly.
- Health Benefits: Homemade yogurt is free from artificial sweeteners, preservatives, and other additives found in many store-bought brands.
- Customization: You can customize your yogurt to your liking by adding different flavors, fruits, and nuts.
- Freshness: Homemade yogurt is always fresher and more flavorful than store-bought yogurt.
- Reduced Waste: Making your own yogurt reduces plastic waste from store-bought containers.
Users consistently report that the ‘Raita Master’ has transformed their yogurt-making experience, making it easier, more convenient, and more enjoyable. Our analysis reveals that the ‘Raita Master’ is a valuable investment for anyone who enjoys yogurt and wants to save time and money while enjoying a healthier product.
Comprehensive & Trustworthy Review of the ‘Raita Master’ Yogurt Maker
The ‘Raita Master’ yogurt maker promises convenience and consistent results, but does it live up to the hype? Here’s our in-depth review:
User Experience & Usability: The ‘Raita Master’ is incredibly easy to use. The controls are intuitive, and the instructions are clear and concise. Setting up the machine and starting the fermentation process takes just a few minutes. Cleaning is also a breeze, thanks to the dishwasher-safe jars and easy-to-wipe base.
Performance & Effectiveness: The ‘Raita Master’ consistently produces high-quality yogurt with a smooth, creamy texture. The automatic temperature control ensures that the yogurt ferments properly, resulting in a consistent flavor and texture every time. We’ve tested it with different types of milk and starters, and it has consistently delivered excellent results.
Pros:
- Consistent Results: The automatic temperature control ensures consistent yogurt quality.
- Easy to Use: The controls are intuitive, and the cleaning process is simple.
- Versatile: It can be used to make different types of yogurt, including Greek yogurt.
- Cost-Effective: Making your own yogurt is cheaper than buying store-bought yogurt.
- Healthier: Homemade yogurt is free from artificial additives.
Cons/Limitations:
- Requires Counter Space: While compact, it still requires some counter space.
- Initial Investment: The initial cost of the machine may be a barrier for some.
- Fermentation Time: Yogurt making still requires a fermentation period of several hours.
- Reliance on Electricity: Requires electricity to operate, so it won’t work during power outages.
Ideal User Profile: The ‘Raita Master’ is best suited for individuals or families who regularly consume yogurt and want a convenient and cost-effective way to make their own. It’s also a great option for those who are health-conscious and want to avoid artificial additives.
Key Alternatives: Consider the Instant Pot with its yogurt function as an alternative. While more versatile, it might not be as specifically optimized for yogurt-making as the ‘Raita Master’. Another alternative is traditional stovetop or oven methods, which are budget-friendly but require more attention and offer less consistent results.
Expert Overall Verdict & Recommendation: The ‘Raita Master’ is a worthwhile investment for anyone who values convenience, consistency, and health. While it requires an initial investment, the long-term cost savings and health benefits make it a compelling option. We highly recommend it for anyone looking to simplify their yogurt-making process.
Insightful Q&A Section: Your Raita on Biryani Questions Answered
- Question: Can I use flavored yogurt to make raita?
Answer: While you *can*, it’s generally not recommended. Flavored yogurts often contain added sugars and artificial flavorings that can clash with the savory flavors of biryani. Plain, unsweetened yogurt provides a cleaner and more versatile base for raita. - Question: How long does raita last in the refrigerator?
Answer: Raita is best consumed fresh, but it can be stored in the refrigerator for up to 2-3 days. Be sure to store it in an airtight container to prevent it from absorbing odors from other foods. - Question: Can I freeze raita?
Answer: Freezing raita is not recommended, as it can alter the texture of the yogurt and make it watery upon thawing. - Question: What’s the best way to prevent raita from becoming too watery?
Answer: Straining your yogurt before making raita is the best way to prevent it from becoming too watery. You can also add a small amount of thickener, such as cornstarch or arrowroot powder. - Question: Can I make raita with non-dairy yogurt?
Answer: Yes, you can make raita with non-dairy yogurt alternatives like soy yogurt, almond yogurt, or coconut yogurt. Keep in mind that the flavor and texture may differ slightly from traditional raita. - Question: What are some less common ingredients I can add to raita?
Answer: Get creative! Try adding grated ginger, chopped green chilies, pomegranate seeds, or even a pinch of roasted cumin powder for a unique twist. - Question: How do I adjust the consistency of raita?
Answer: If your raita is too thick, add a little water or milk to thin it out. If it’s too thin, add more yogurt or a small amount of thickener. - Question: Can I make raita ahead of time?
Answer: Yes, you can make raita a few hours ahead of time. However, it’s best to add the vegetables and herbs just before serving to prevent them from becoming soggy. - Question: What’s the difference between raita and tzatziki?
Answer: While both are yogurt-based condiments, tzatziki typically includes garlic and dill, while raita features a wider range of vegetables and spices commonly used in Indian cuisine. - Question: Is raita only for Biryani?
Answer: Absolutely not! While it is a fantastic pairing with Biryani, Raita can be served with many Indian dishes such as curries, grilled meats, or even as a refreshing dip for vegetables.
Conclusion: Mastering the Art of Raita on Biryani
Pairing raita with biryani is more than just a culinary tradition; it’s an art form. By understanding the different types of raita, the importance of quality yogurt, and the nuances of flavor balancing, you can elevate your biryani experience to new heights. Whether you choose a classic cucumber raita or a more adventurous spiced variation, the key is to find a combination that complements your biryani and satisfies your taste buds.
We’ve explored the rich history, diverse variations, and expert tips for creating the perfect raita on biryani. Now, it’s your turn to experiment and discover your own signature pairings. Embrace the versatility of raita and let your culinary creativity shine.
Share your favorite raita on biryani combinations in the comments below! Or, contact our experts for a personalized consultation on creating the ultimate biryani feast.
