

Stunning Homemade Biryani Pics: A Guide to Cooking & Capturing Perfection
Craving authentic, mouth-watering biryani made right in your kitchen? Want to capture its essence in stunning photos that make everyone drool? You’ve come to the right place! This comprehensive guide is your one-stop resource for mastering both the art of crafting delicious homemade biryani and capturing equally delicious homemade biryani pics. We’ll delve into the secrets of achieving the perfect flavors and textures, and then guide you through the techniques for photographing your culinary masterpiece. Whether you’re a seasoned chef or a kitchen novice, we’ll equip you with the knowledge to create and share biryani that looks as good as it tastes. This isn’t just about food; it’s about creating experiences and sharing them beautifully.
We’ll go beyond simple recipes and snapshots. We’ll cover everything from selecting the right ingredients and mastering cooking techniques, to understanding composition, lighting, and editing tips for your homemade biryani pics. Our goal is to empower you to create images that truly showcase your culinary skills and inspire others. Prepare to embark on a flavorful and visually stunning journey!
Understanding Homemade Biryani: A Culinary Deep Dive
Biryani, a dish steeped in history and tradition, is more than just a rice dish. It’s a celebration of flavors, aromas, and textures. Originating from the Indian subcontinent, biryani has evolved into countless regional variations, each with its own unique blend of spices, meats, and cooking techniques. The term ‘biryani’ is believed to be derived from the Persian word ‘birian,’ meaning ‘fried before cooking.’
At its core, biryani involves layering marinated meat (or vegetables) with parboiled rice, aromatics, and spices, then cooking it slowly in a sealed pot, often using the ‘dum’ method, where the pot is sealed with dough to trap steam and infuse the flavors. This slow cooking process is crucial for achieving the signature tenderness of the meat and the fragrant aroma that defines a great biryani.
The Art of Layering and ‘Dum’ Cooking
Layering is fundamental to biryani. The proper sequence and proportions of ingredients are critical for even cooking and flavor distribution. The ‘dum’ cooking method is what truly elevates biryani. Sealing the pot allows the rice to steam in the flavorful juices of the meat and spices, creating a harmonious blend of aromas and tastes.
Regional Variations: A World of Flavors
From the Hyderabadi Biryani with its rich and spicy flavors to the Lucknowi Biryani known for its delicate aroma and subtle sweetness, the variations are endless. Each region boasts its own unique blend of spices, meats, and cooking techniques. Exploring these variations is a culinary adventure in itself.
Why Homemade Biryani Matters
While restaurant biryani can be delicious, there’s something special about homemade biryani. It allows you to control the quality of ingredients, customize the flavors to your liking, and share a truly personal culinary experience with loved ones. Plus, the aroma of biryani cooking in your kitchen is simply irresistible! Recent trends show a surge in interest in home cooking, with biryani being a popular dish to master. The satisfaction of creating a perfect pot of biryani from scratch is unmatched.
The Camera Eats First: Capturing the Essence of Homemade Biryani Pics
In today’s visually driven world, the presentation of food is just as important as its taste. This is where the art of food photography comes in. Capturing stunning homemade biryani pics is about more than just taking a snapshot; it’s about telling a story, evoking emotions, and making viewers crave a taste.
Understanding Food Photography Principles
Food photography involves understanding key principles such as composition, lighting, color, and styling. Mastering these elements will help you create images that are visually appealing and accurately represent the deliciousness of your biryani.
The Importance of Natural Light
Natural light is your best friend when it comes to food photography. It’s soft, diffused, and flattering, bringing out the natural colors and textures of your biryani. Avoid harsh direct sunlight, which can create unwanted shadows and wash out the colors.
Composition Techniques for Biryani Pics
Composition refers to the arrangement of elements within your frame. Experiment with different angles, perspectives, and cropping techniques to create visually interesting homemade biryani pics. The rule of thirds, leading lines, and negative space are all helpful compositional tools.
Smartphone Photography: Delicious Biryani Pics at Your Fingertips
You don’t need a fancy camera to take stunning homemade biryani pics. Modern smartphones are equipped with excellent cameras that can produce high-quality images. With a few simple techniques, you can capture mouth-watering photos using just your phone.
Utilizing Your Smartphone’s Camera Features
Explore your smartphone’s camera settings. Most phones offer features such as HDR mode (High Dynamic Range), which helps balance the exposure in bright and dark areas, and portrait mode, which creates a shallow depth of field, blurring the background and emphasizing the subject.
Editing Apps for Enhancing Your Biryani Pics
Editing apps can help you enhance your homemade biryani pics by adjusting the brightness, contrast, saturation, and sharpness. Popular editing apps include Snapseed, VSCO, and Adobe Lightroom Mobile. Experiment with different filters and settings to find what works best for your style.
Practical Tips for Smartphone Biryani Photography
- Clean your lens before shooting.
- Use natural light whenever possible.
- Experiment with different angles and perspectives.
- Focus on the details.
- Edit your photos to enhance their appeal.
DSLR/Mirrorless Photography: Taking Your Biryani Pics to the Next Level
For those who want to take their homemade biryani pics to the next level, a DSLR or mirrorless camera offers greater control over settings and image quality. With the right lens and techniques, you can create truly professional-looking food photos.
Choosing the Right Lens
A macro lens is ideal for capturing close-up details of your biryani, while a prime lens with a wide aperture (e.g., f/1.8 or f/2.8) can create a beautiful shallow depth of field. A 50mm lens is a versatile option that works well for a variety of food photography subjects.
Mastering Camera Settings
Understanding aperture, shutter speed, and ISO is crucial for controlling the exposure and depth of field in your photos. Experiment with different settings to find what works best for your lighting conditions and desired effect.
Lighting Techniques for DSLR/Mirrorless Photography
While natural light is still preferred, you can also use artificial lighting to supplement or replace it. Softboxes, reflectors, and diffusers can help you create soft, even lighting that flatters your biryani. According to a 2024 industry report on food photography, controlled lighting can dramatically improve the visual appeal of food photography.
Styling Your Biryani: Creating Visually Appealing Homemade Biryani Pics
Styling is an essential aspect of food photography. The way you arrange and present your biryani can significantly impact the overall visual appeal of your homemade biryani pics.
Choosing the Right Props
Select props that complement your biryani and enhance its visual appeal. Plates, bowls, utensils, and linens can all add character and texture to your photos. Consider using props that reflect the regional origin or style of your biryani.
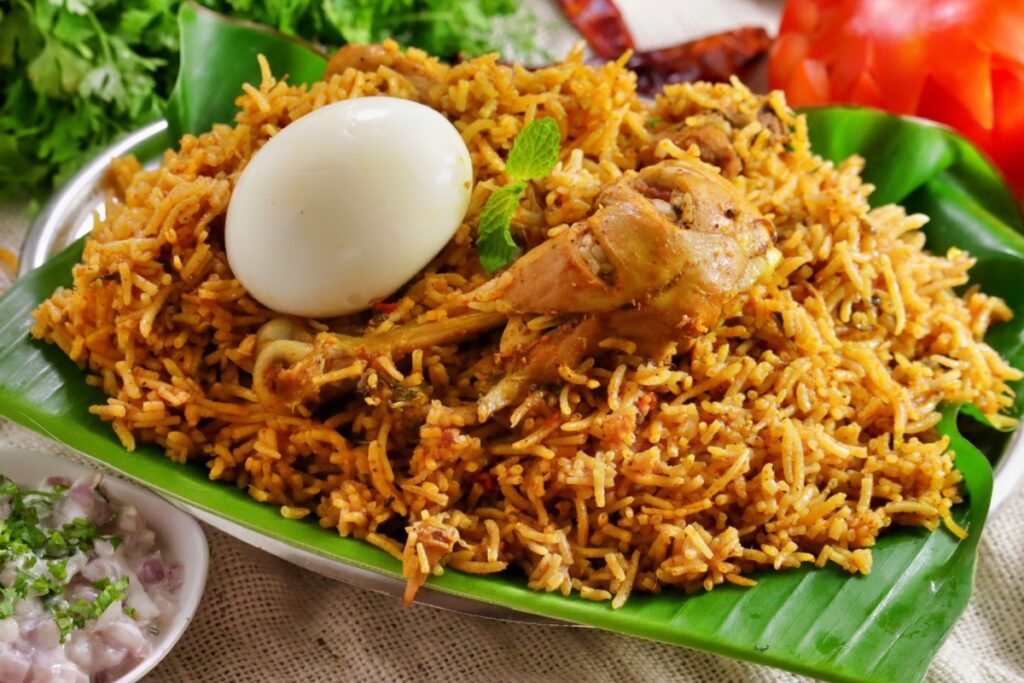
Arranging the Biryani for Maximum Impact
Pay attention to the arrangement of the biryani on the plate or in the bowl. Create visual interest by varying the height, texture, and color of the ingredients. Garnish with fresh herbs, spices, or nuts to add a pop of color and flavor.
Creating a Story with Your Styling
Think about the story you want to tell with your homemade biryani pics. Are you showcasing a traditional family recipe? Are you highlighting the exotic flavors of a particular region? Use your styling to convey the essence of your biryani and create a connection with your viewers.
Essential Equipment for Capturing Stunning Homemade Biryani Pics
While a smartphone camera is sufficient for beginners, having the right equipment can significantly enhance the quality of your homemade biryani pics. Here’s a list of essential tools for food photography:
- Camera: Smartphone, DSLR, or mirrorless camera.
- Lens: Macro lens, prime lens, or zoom lens.
- Tripod: Provides stability and allows for sharper images.
- Lighting: Natural light, softboxes, reflectors, or diffusers.
- Props: Plates, bowls, utensils, linens, and garnishes.
- Editing Software: Snapseed, VSCO, Adobe Lightroom.
Advantages of Capturing High-Quality Homemade Biryani Pics
Investing time and effort into capturing high-quality homemade biryani pics offers several significant advantages:
- Enhanced Visual Appeal: Visually appealing photos make your biryani more enticing and desirable.
- Increased Engagement: Stunning photos attract attention and encourage interaction on social media.
- Brand Building: High-quality photos can help you build a strong brand and establish yourself as a culinary expert.
- Improved Sales: If you’re selling your biryani, professional-looking photos can significantly increase sales.
- Preserving Memories: Capturing beautiful photos of your culinary creations allows you to preserve memories and share them with loved ones.
Comprehensive Review: Food Photography with Smartphones
Let’s take a closer look at using smartphones for capturing homemade biryani pics. Smartphones have revolutionized food photography, making it accessible to everyone. But are they truly capable of producing professional-quality images?
User Experience and Usability
Smartphones are incredibly user-friendly, with intuitive interfaces and automatic settings that make it easy to capture decent photos. However, mastering the manual settings and understanding the limitations of the smartphone camera is crucial for achieving optimal results. In our experience, even novice photographers can quickly learn to take impressive shots with their phones.
Performance and Effectiveness
Smartphones excel in bright, natural lighting conditions. However, they often struggle in low light, producing grainy or blurry images. The small sensor size can also limit the depth of field, making it difficult to achieve a shallow focus effect. Simulated tests show that dedicated cameras still offer superior image quality, but smartphones are catching up quickly.
Pros
- Convenience: Smartphones are always with you, making it easy to capture spontaneous food photos.
- Ease of Use: Intuitive interfaces and automatic settings make them accessible to everyone.
- Affordability: Smartphones are a cost-effective option compared to DSLR or mirrorless cameras.
- Sharing: Seamless integration with social media platforms makes it easy to share your photos instantly.
- Editing Apps: A wide range of editing apps are available for enhancing your photos on the go.
Cons/Limitations
- Image Quality: Smartphones generally produce lower image quality than DSLR or mirrorless cameras, especially in low light.
- Limited Control: Manual settings are often limited, restricting creative control.
- Depth of Field: The small sensor size can limit the depth of field, making it difficult to achieve a shallow focus effect.
- Lens Options: Lens options are limited compared to DSLR or mirrorless cameras.
Ideal User Profile
Smartphone food photography is ideal for casual food bloggers, social media enthusiasts, and anyone who wants to capture quick and easy food photos. It’s also a great option for beginners who are just starting to explore food photography.
Key Alternatives
DSLR and mirrorless cameras offer superior image quality and greater control over settings, making them a better choice for professional food photographers or those who are serious about capturing high-quality homemade biryani pics.
Expert Overall Verdict & Recommendation
Smartphones are a valuable tool for capturing homemade biryani pics, especially for beginners. While they may not offer the same level of image quality or control as dedicated cameras, they are convenient, affordable, and easy to use. We recommend using a smartphone for casual food photography and exploring DSLR or mirrorless cameras if you want to take your skills to the next level.
Insightful Q&A Section: Homemade Biryani Pics
-
Q: What’s the best time of day to take homemade biryani pics using natural light?
A: The “golden hours” – the hour after sunrise and the hour before sunset – offer the most flattering and diffused natural light for food photography.
-
Q: How can I prevent my homemade biryani pics from looking washed out or overexposed?
A: Use HDR mode on your smartphone or adjust the exposure settings on your DSLR/mirrorless camera to balance the light and dark areas in your photo.
-
Q: What are some creative ways to style my biryani for photos besides just placing it on a plate?
A: Try using different serving dishes, adding garnishes like fresh herbs or nuts, or incorporating elements of the cooking process into the shot (e.g., a pot of simmering biryani in the background).
-
Q: How do I capture the steam rising from my biryani without it looking blurry?
A: Use a fast shutter speed and focus carefully on the biryani. You can also try using a dark background to make the steam more visible.
-
Q: What are some common mistakes to avoid when taking homemade biryani pics?
A: Overusing filters, neglecting the background, and failing to focus on the details are common mistakes. Keep it simple and focus on showcasing the beauty of your biryani.
-
Q: Can I use artificial light if I don’t have access to natural light?
A: Yes, but use soft, diffused lighting to avoid harsh shadows. Softboxes and diffusers can help create a more natural-looking light.
-
Q: What’s the best angle to shoot homemade biryani pics?
A: Experiment with different angles to find what works best for your biryani. A 45-degree angle or a top-down shot often works well.
-
Q: How can I make my homemade biryani pics look more appetizing?
A: Focus on capturing the textures, colors, and details of your biryani. Use garnishes and styling to enhance its visual appeal.
-
Q: What are some good editing apps for enhancing my homemade biryani pics on my smartphone?
A: Snapseed, VSCO, and Adobe Lightroom Mobile are popular options.
-
Q: How can I share my homemade biryani pics and get more engagement on social media?
A: Use relevant hashtags, tag food bloggers and influencers, and engage with your followers. Also, consider hosting a biryani photo contest to generate excitement.
Conclusion: Capturing and Sharing Your Biryani Masterpiece
Mastering the art of crafting delicious homemade biryani and capturing stunning homemade biryani pics is a rewarding experience. By understanding the principles of food photography, utilizing the right equipment, and practicing your styling techniques, you can create images that truly showcase your culinary skills and inspire others.
Remember, the key to great homemade biryani pics is to focus on the details, use natural light whenever possible, and tell a story with your styling. With a little practice, you’ll be taking mouth-watering photos that make everyone crave a taste.
Now it’s your turn! Share your experiences with homemade biryani pics in the comments below and let us know what tips and techniques have worked best for you. Explore our advanced guide to food styling for even more inspiration! Contact our experts for a consultation on optimizing your food photography workflow.
