

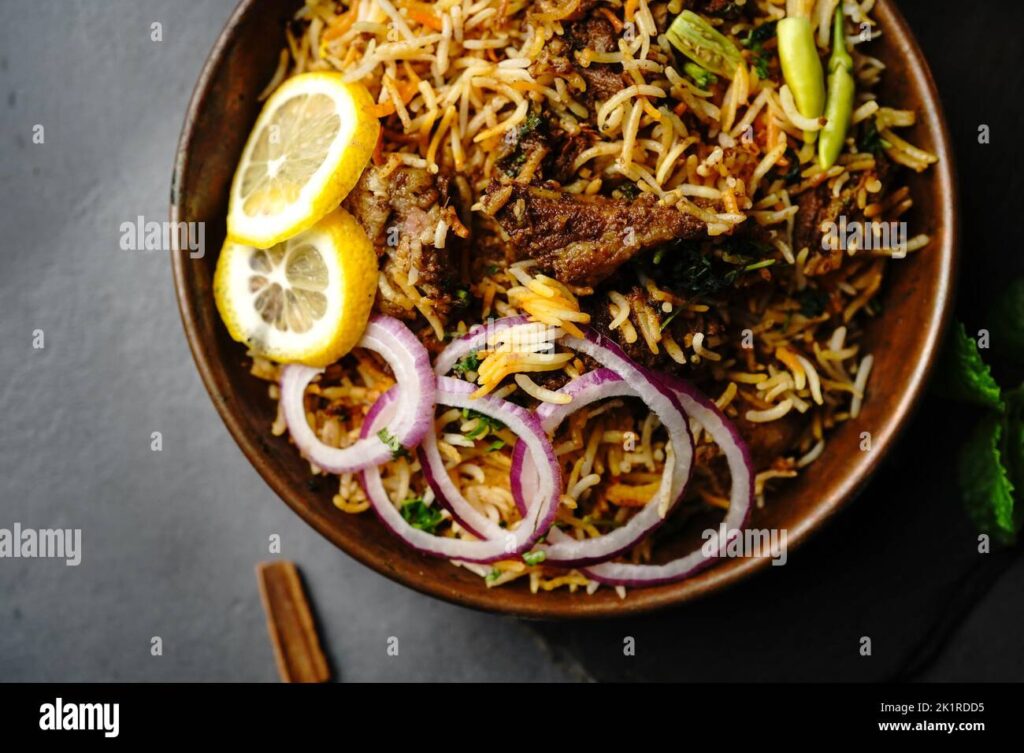
Hyderabadi Biryani Raita: The Secret to Unlocking Biryani Bliss
Hyderabadi Biryani, a culinary masterpiece celebrated worldwide, is more than just a dish; it’s an experience. But what truly elevates this experience to another level? The answer lies in the perfect accompaniment: Hyderabadi Biryani Raita. This creamy, cooling side dish isn’t merely an afterthought; it’s an integral part of the Hyderabadi Biryani tradition, designed to complement the rich flavors and spices of the biryani itself. In this comprehensive guide, we’ll delve into the art of crafting the perfect Hyderabadi Biryani Raita, exploring its history, variations, and the secrets to achieving that exquisite balance of flavors that will leave you craving more.
Whether you’re a seasoned chef or a home cook looking to perfect your Hyderabadi Biryani game, this article provides the knowledge and expertise you need. We’ll cover everything from the essential ingredients and techniques to troubleshooting common problems and exploring creative variations. Prepare to embark on a culinary journey that will transform your biryani experience forever.
What is Hyderabadi Biryani Raita? A Deep Dive
Hyderabadi Biryani Raita is a yogurt-based condiment, or side dish, specifically crafted to accompany Hyderabadi Biryani. It’s a cooling counterpoint to the biryani’s inherent richness and spice. The raita’s primary function is to refresh the palate, providing a light and tangy contrast that enhances the overall dining experience. Unlike some other raita variations, Hyderabadi Biryani Raita typically features a specific set of ingredients and preparation techniques that align with the distinctive flavors of Hyderabadi cuisine. This includes ingredients like fresh coriander, mint, green chilies (often finely minced), and sometimes a hint of roasted cumin powder.
The beauty of Hyderabadi Biryani Raita lies in its simplicity. It’s quick to prepare, requires minimal ingredients, and yet, it elevates the biryani to new heights. The coolness of the yogurt, combined with the fresh herbs and subtle spice, acts as a palate cleanser, allowing you to fully appreciate the complex flavors of the biryani with each bite.
The History and Evolution of Biryani Raita
While the exact origins of Hyderabadi Biryani Raita are difficult to pinpoint, its development is intrinsically linked to the history of Hyderabadi Biryani itself. As the biryani evolved from a simpler rice and meat dish to the complex and flavorful creation we know today, the need for a complementary side dish arose. Raita, in its various forms, has been a staple in Indian cuisine for centuries, serving as a cooling accompaniment to spicy dishes. It’s likely that the Hyderabadi Biryani Raita evolved as a specific adaptation of this general concept, tailored to perfectly complement the unique flavors of Hyderabadi Biryani.
Over time, different families and cooks have undoubtedly developed their own variations of Hyderabadi Biryani Raita, adding or modifying ingredients to suit their preferences. This has led to a diverse range of recipes, each with its own subtle nuances. However, the core principles remain the same: a yogurt base, fresh herbs, and a touch of spice, all working together to create a refreshing and palate-cleansing counterpoint to the rich and flavorful biryani.
The Essential Ingredients for Authentic Hyderabadi Biryani Raita
Creating authentic Hyderabadi Biryani Raita requires a specific set of ingredients, each playing a crucial role in achieving the desired flavor profile. Here’s a breakdown of the key components:
- Yogurt: The foundation of any good raita is high-quality yogurt. Opt for plain, unsweetened yogurt, preferably full-fat for a richer and creamier texture. Some prefer Greek yogurt for its thickness, but traditionally, regular yogurt is used.
- Fresh Coriander (Cilantro): Fresh coriander leaves add a vibrant, herbaceous flavor that is essential to Hyderabadi Biryani Raita. Be sure to use both the leaves and tender stems for maximum flavor.
- Fresh Mint: Mint provides a cooling and refreshing element that complements the coriander perfectly. Use fresh mint leaves, finely chopped.
- Green Chilies: A touch of heat is crucial to balance the coolness of the yogurt and herbs. Use green chilies, finely minced, according to your spice preference. Serranos or Thai green chilies are good options. Remember to remove the seeds for a milder flavor.
- Roasted Cumin Powder: Roasted cumin powder adds a warm, earthy note that enhances the overall flavor profile. Roast whole cumin seeds in a dry pan until fragrant, then grind them into a fine powder.
- Salt: Salt is essential to season the raita and bring out the flavors of the other ingredients. Use sea salt or Himalayan pink salt for the best results.
- Optional Ingredients: Some variations may include grated cucumber for added coolness and texture, or a pinch of black salt (kala namak) for a unique savory flavor.
Step-by-Step Guide to Making the Perfect Hyderabadi Biryani Raita
Now that you know the essential ingredients, let’s walk through the process of making Hyderabadi Biryani Raita. This recipe is simple and straightforward, but attention to detail is key to achieving the perfect balance of flavors.
- Prepare the Yogurt: In a bowl, whisk the yogurt until smooth and creamy. If the yogurt is too thick, add a tablespoon or two of cold water to achieve the desired consistency. It should be pourable but not watery.
- Chop the Herbs and Chilies: Finely chop the fresh coriander and mint leaves. Mince the green chilies, removing the seeds if desired.
- Combine the Ingredients: Add the chopped coriander, mint, and green chilies to the yogurt. Sprinkle in the roasted cumin powder and salt.
- Mix Well: Gently mix all the ingredients together until well combined. Be careful not to overmix, as this can make the yogurt watery.
- Chill and Serve: Cover the raita and refrigerate for at least 30 minutes to allow the flavors to meld. Serve chilled alongside Hyderabadi Biryani.
Tips for Achieving Raita Perfection
- Use Fresh Ingredients: The quality of the ingredients directly impacts the flavor of the raita. Always use fresh herbs and high-quality yogurt.
- Adjust the Spice Level: Add green chilies according to your spice preference. Start with a small amount and add more to taste.
- Don’t Overmix: Overmixing can make the yogurt watery. Gently mix the ingredients until just combined.
- Chill Before Serving: Chilling the raita allows the flavors to meld and enhances the overall taste.
- Experiment with Variations: Feel free to experiment with different ingredients and variations to find your perfect Hyderabadi Biryani Raita.
Understanding the Importance of Raita with Hyderabadi Biryani
Raita isn’t just a side dish; it’s a crucial element in the overall Hyderabadi Biryani experience. Its cooling and refreshing properties provide a necessary counterpoint to the richness and spice of the biryani, enhancing the flavors and preventing the palate from becoming overwhelmed. Without raita, the biryani can feel heavy and monotonous. The raita, on the other hand, provides a welcome contrast, allowing you to fully appreciate the complex flavors of the biryani with each bite.
Think of it as a symphony of flavors. The biryani is the main melody, rich and complex, while the raita is the harmony, providing a subtle and refreshing counterpoint that enhances the overall composition. Together, they create a complete and satisfying culinary experience.
Common Mistakes to Avoid When Making Hyderabadi Biryani Raita
While the recipe for Hyderabadi Biryani Raita is simple, there are a few common mistakes that can detract from the final product. Here are some pitfalls to avoid:
- Using Sour Yogurt: Sour yogurt will make the raita unpalatable. Always use fresh, unsweetened yogurt.
- Adding Too Much Water: Adding too much water will make the raita watery and dilute the flavors. Add water sparingly, only if necessary to achieve the desired consistency.
- Using Dried Herbs: Dried herbs lack the vibrant flavor of fresh herbs and should be avoided.
- Forgetting to Chill: Chilling the raita is essential to allow the flavors to meld and enhance the overall taste.
- Over-Spicing: Adding too many green chilies can overpower the other flavors. Start with a small amount and add more to taste.
Creative Variations on Hyderabadi Biryani Raita
While the classic Hyderabadi Biryani Raita is a masterpiece in itself, there’s always room for experimentation and creativity. Here are a few variations to try:
- Cucumber Raita: Add grated cucumber to the classic recipe for added coolness and texture.
- Beetroot Raita: Add grated beetroot for a vibrant color and a slightly sweet and earthy flavor.
- Pomegranate Raita: Add pomegranate seeds for a burst of sweetness and a crunchy texture.
- Pineapple Raita: Add small pieces of pineapple for a sweet and tangy tropical twist.
- Spiced Buttermilk Raita: Use buttermilk instead of yogurt for a lighter and tangier flavor. Add a pinch of red chili powder for extra spice.
These variations can add a unique twist to your Hyderabadi Biryani experience, allowing you to customize the raita to your personal preferences.
Hyderabadi Biryani Raita vs. Other Raita Varieties
While all raitas share the common characteristic of being yogurt-based, Hyderabadi Biryani Raita distinguishes itself through its specific flavor profile and intended pairing. Unlike a generic raita that might be served with various dishes, Hyderabadi Biryani Raita is meticulously crafted to complement the unique spices and richness of Hyderabadi Biryani.
For instance, a North Indian raita might include ingredients like boondi (small fried chickpea flour balls) or a wider range of spices like garam masala. These elements would clash with the delicate balance of flavors in Hyderabadi Biryani. Similarly, a South Indian raita might incorporate mustard seeds and curry leaves, which are not traditionally used in Hyderabadi cuisine. The key difference lies in the deliberate selection of ingredients and their proportions to achieve a harmonious pairing with the biryani.
The Science Behind the Perfect Pairing
The pairing of Hyderabadi Biryani and raita isn’t just a matter of tradition; there’s a scientific basis for its effectiveness. The capsaicin in chilies, which contributes to the biryani’s spiciness, triggers a heat sensation in the mouth. Yogurt, being a cooling agent, contains casein, a protein that binds to capsaicin molecules, effectively neutralizing the heat. This allows you to enjoy the biryani’s complex flavors without being overwhelmed by the spice.
Furthermore, the acidity of yogurt helps to break down the fats in the biryani, making it easier to digest. The herbs in the raita, such as coriander and mint, also aid digestion and provide a refreshing counterpoint to the richness of the biryani.
Why Hyderabadi Biryani Raita Matters Today
In an era of culinary experimentation and fusion cuisine, the importance of preserving traditional pairings like Hyderabadi Biryani Raita cannot be overstated. While innovation is essential, understanding and respecting the foundations of culinary traditions is equally important. Hyderabadi Biryani Raita represents a carefully crafted balance of flavors that has been perfected over generations. By adhering to the traditional recipe and techniques, we can ensure that this culinary heritage is preserved for future generations to enjoy. Moreover, as global interest in authentic regional cuisines continues to grow, mastering the art of Hyderabadi Biryani Raita becomes increasingly relevant for chefs and home cooks alike.
Expert Q&A on Hyderabadi Biryani Raita
- Q: Can I use flavored yogurt for raita?
- A: No, flavored yogurt will clash with the flavors of the biryani. Always use plain, unsweetened yogurt.
- Q: Can I make raita ahead of time?
- A: Yes, you can make raita a few hours ahead of time. However, it’s best to add the herbs and chilies just before serving to prevent them from wilting.
- Q: What if my raita is too watery?
- A: Drain the yogurt through a cheesecloth for a few hours to remove excess water.
- Q: Can I use dried mint instead of fresh mint?
- A: Fresh mint is always preferable, but if you must use dried mint, use half the amount.
- Q: How long does raita last in the fridge?
- A: Raita will last for 2-3 days in the fridge.
- Q: Can I freeze raita?
- A: Freezing raita is not recommended as it can change the texture of the yogurt.
- Q: What is the best way to chop the herbs?
- A: Use a sharp knife and chop the herbs finely to release their flavors.
- Q: Can I add sugar to raita?
- A: Adding sugar is not traditional, but you can add a pinch if you prefer a slightly sweeter flavor.
- Q: What is the best yogurt to use for raita?
- A: Full-fat yogurt is preferable for a richer and creamier texture.
- Q: Can I use lemon juice in raita?
- A: A small squeeze of lemon juice can add a touch of brightness to the raita.
Conclusion: Mastering the Art of Hyderabadi Biryani Raita
Hyderabadi Biryani Raita is more than just a side dish; it’s an essential element in the overall Hyderabadi Biryani experience. By understanding the history, ingredients, and techniques involved in making this classic accompaniment, you can elevate your biryani game to new heights. Whether you’re a seasoned chef or a home cook, mastering the art of Hyderabadi Biryani Raita is a worthwhile pursuit that will undoubtedly impress your guests and tantalize your taste buds.
Now that you’ve explored the world of Hyderabadi Biryani Raita, we encourage you to experiment with different variations and find your perfect recipe. Share your creations and experiences in the comments below, and let’s continue to celebrate the rich culinary heritage of Hyderabadi cuisine.
